


There are a lot of articles on how to send an email with SendGrid, but when I wanted to create a mailing list, I found myself facing a very light documentation. After a few hours of trial and error, I thought that documenting the whole thing wouldn’t hurt!
Setup SendGrid
Create an API Key
Go to https://app.sendgrid.com/settings/api_keys to create an API key.
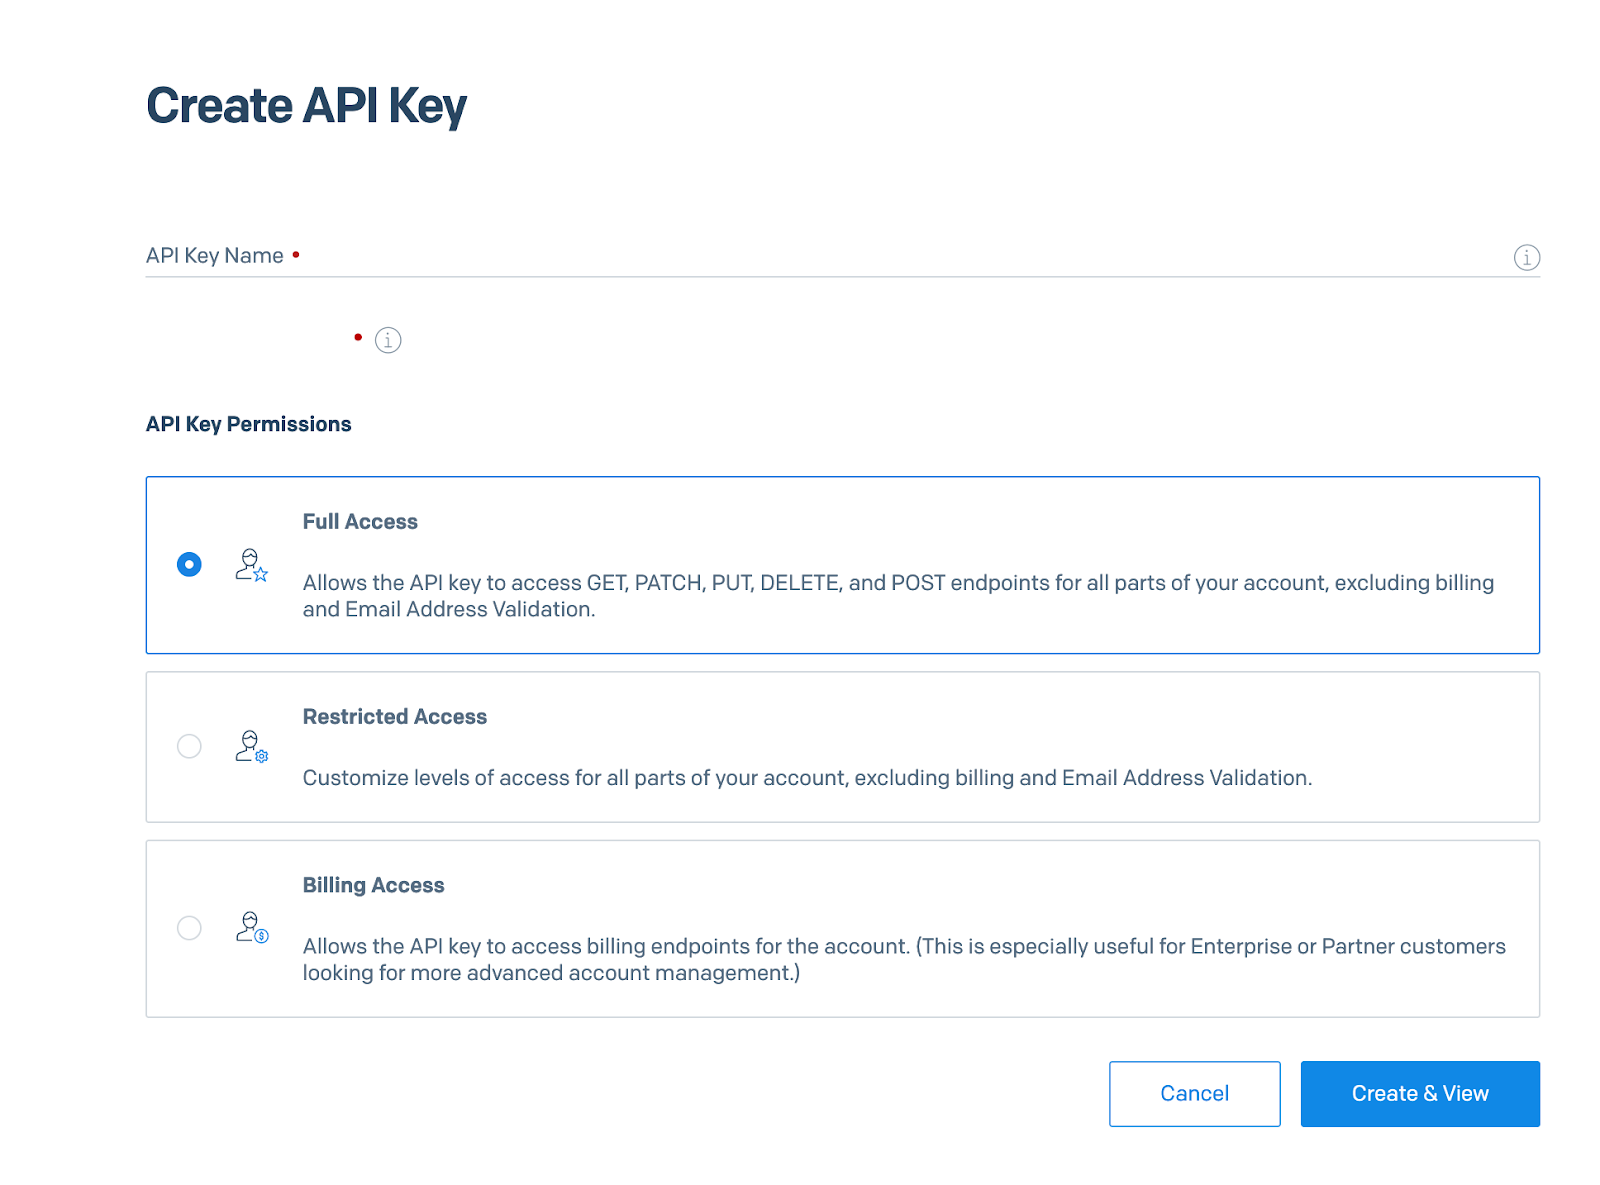
You can allow full access to all data or select only the parts you need. If you want to create a key with restricted access, you will have to activate the “Marketing” section. Keep your key carefully, you can only view it once!
Create a sender
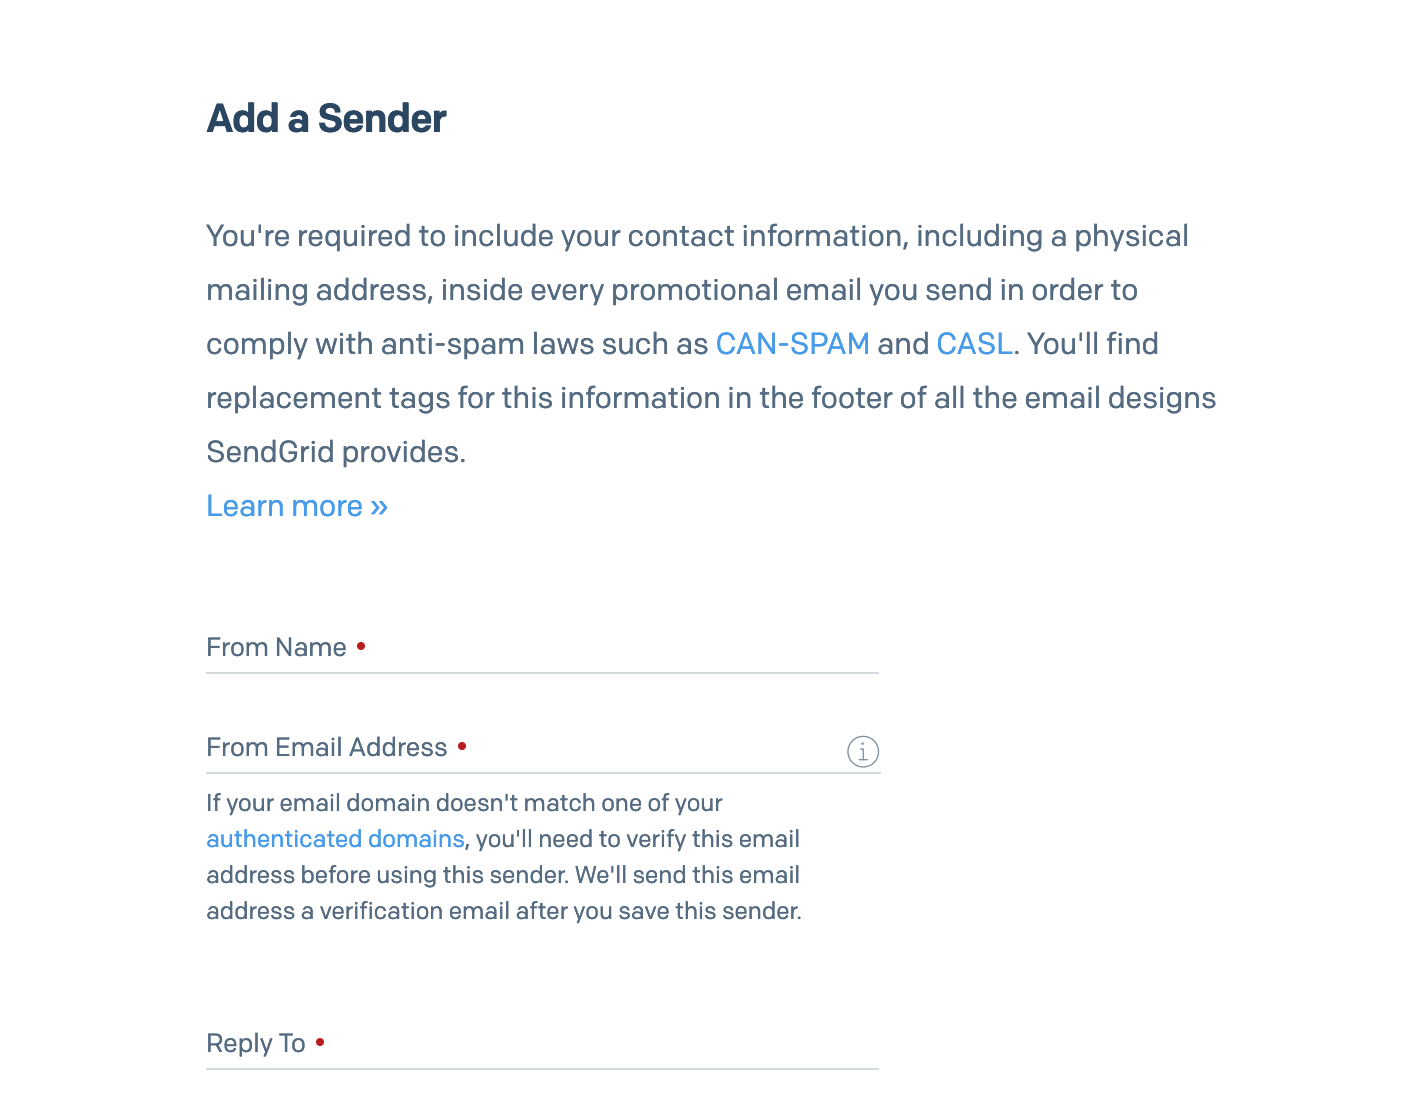
To send a newsletter, you must have an email address! Be careful, you must have an authenticated domain name on Sendgrid before you can add an address. This is not the purpose of this tutorial but SendGrid guides you step by step in their dashboard to do so, at this address.
Add a list
You have your key and your Sender? Great! Now go to Marketing -> Contacts
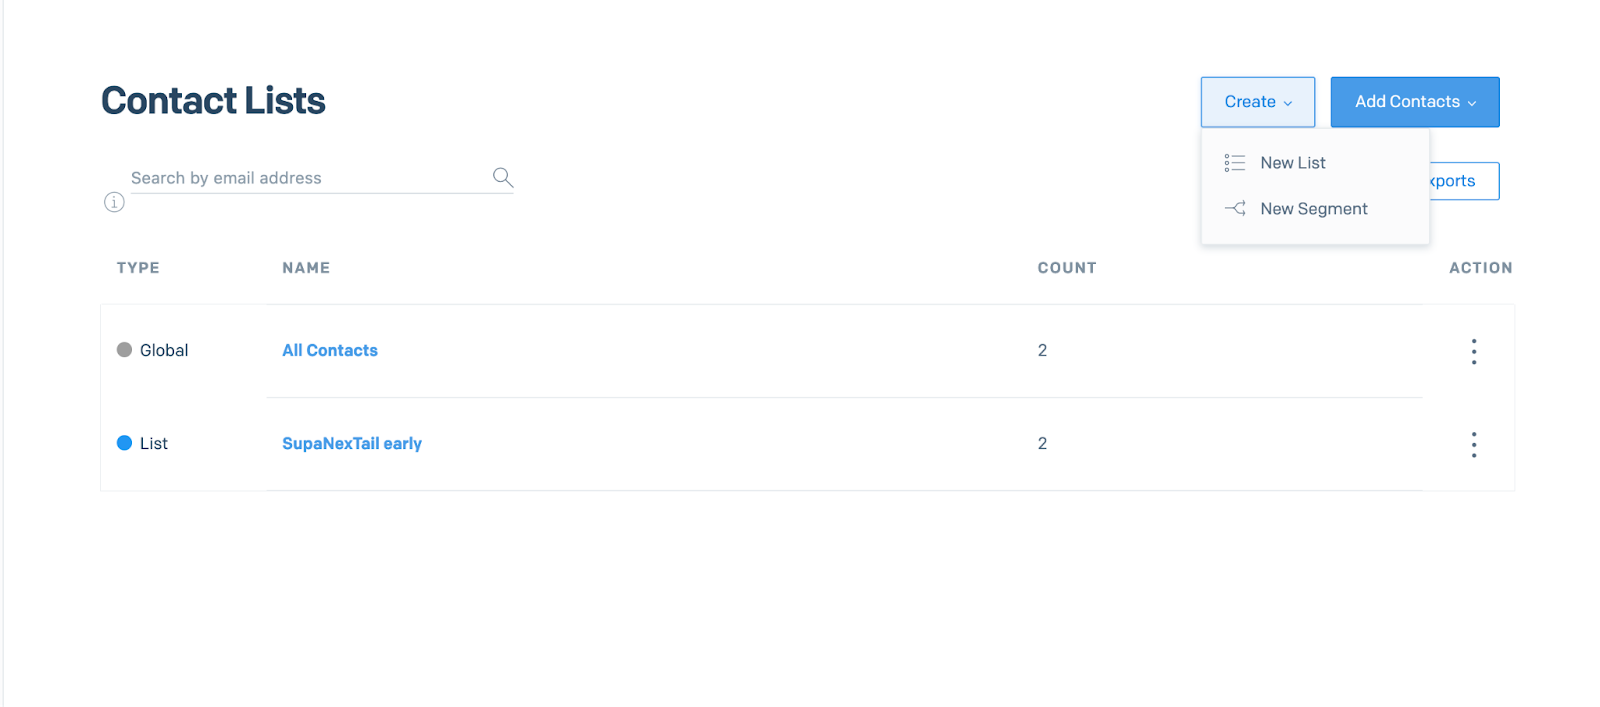
Once this list is created, you will need to note the ID of this list, you will need it later. Click on the list and you will see a URL like this: https://mc.sendgrid.com/contacts/lists/XXX where “XXX” is the ID of your list.
Create an automatic welcome email
You have almost finished configuring SendGrid! All you need is a welcome email, sent automatically to the people who have subscribed to your mailing list.
To do this, go to Marketing -> Automations in your dashboard, and click on “Create an automation” at the top right.
SendGrid has planned this and you can choose a pre-built template. Select “Welcome”.

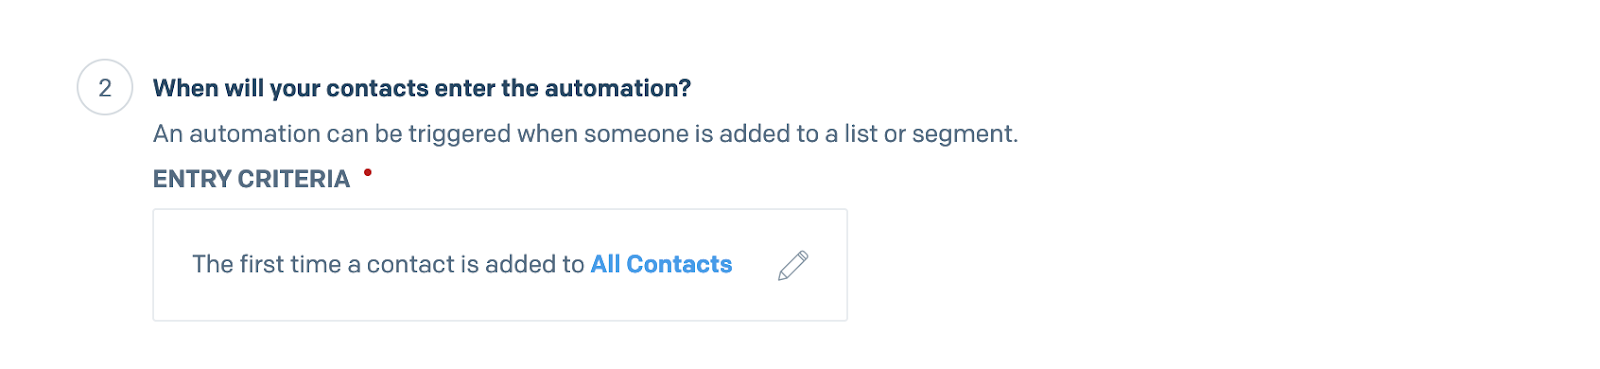
Configure your automation system as you wish, just be careful to change the “entry criteria” with your list
At the bottom of the page, you will also see that there are several emails listed. If you want to send only one email following a registration, delete the other templates and keep only one. You can of course keep this structure if you want to send several emails following a registration.
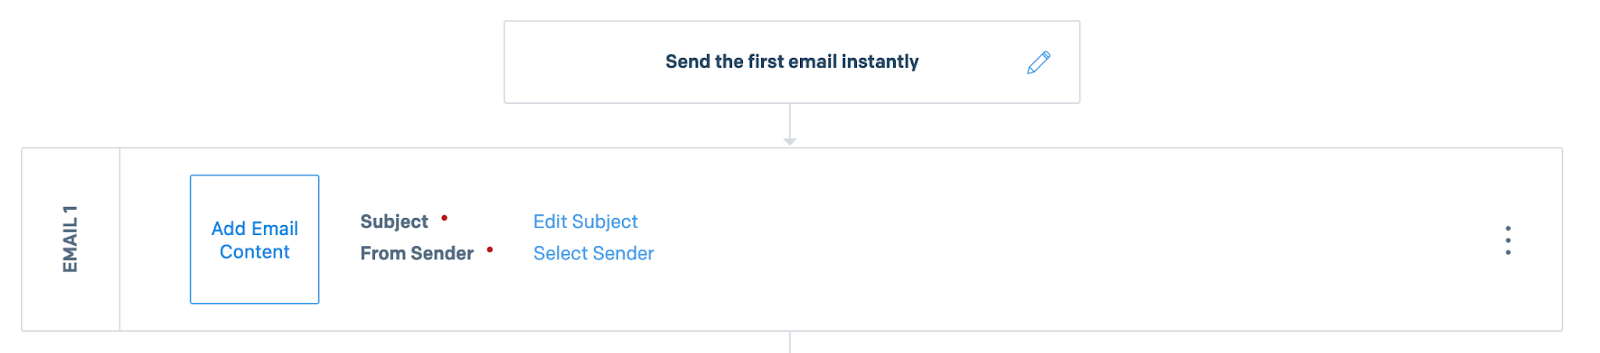
This is where you can configure your mail. Don’t forget to add the Sender you created earlier. The content is up to you, be creative!
And that’s it, we’ve finished configuring SendGrid! All that’s left now is the code part, go now to our favorite IDE.
The backend with Next.js API Routes
Your environment variables
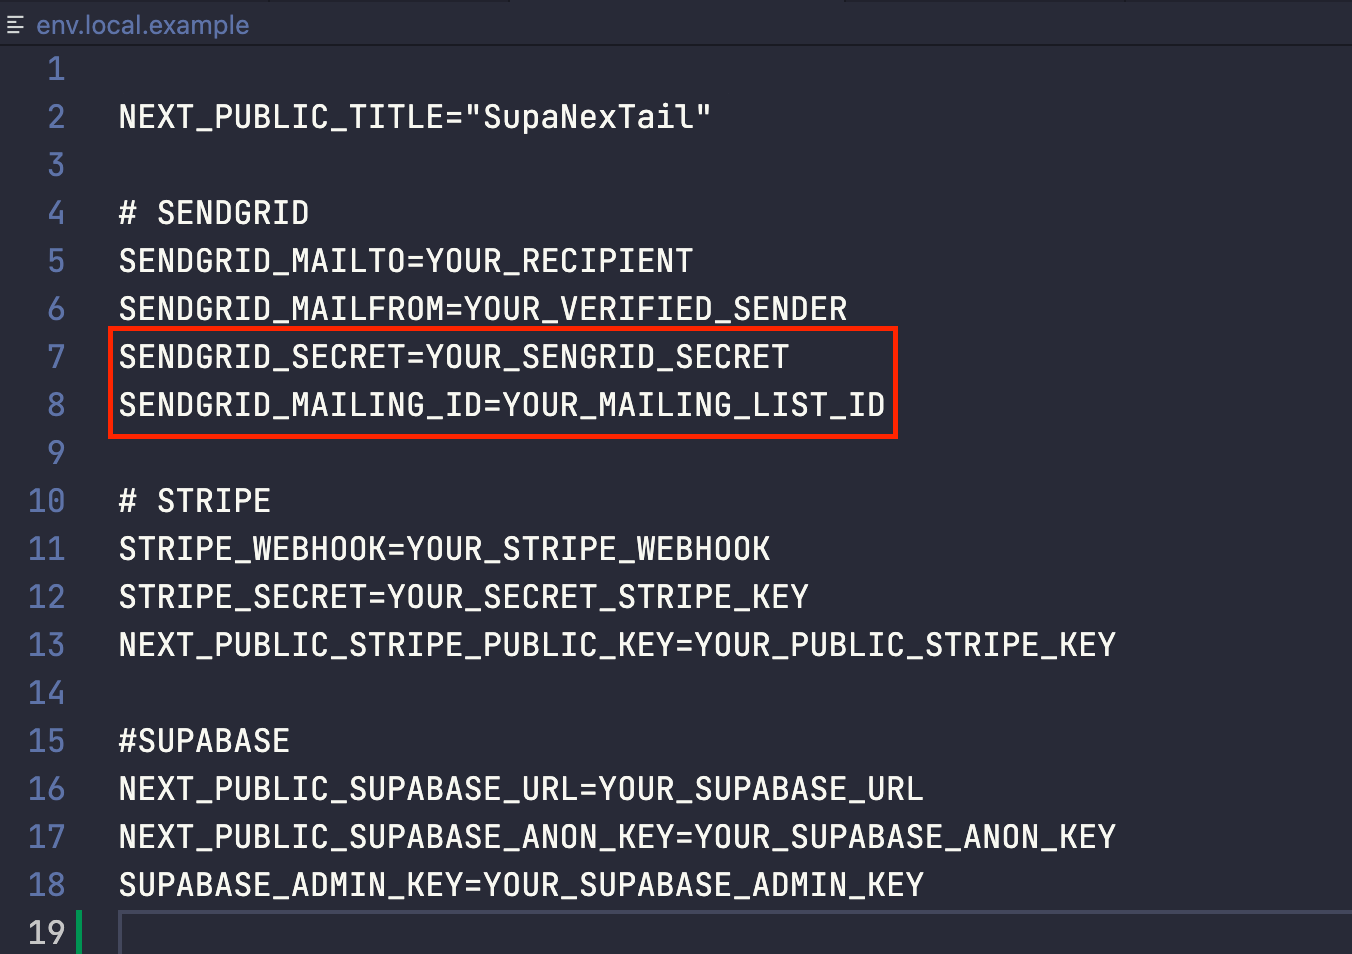
I hope you haven’t lost your key created at the beginning of this tutorial! You’ll have to add it in an .env file at the root of your Next.js project. Let’s call this variable “SENDGRID_SECRET”.
You can also add your ID from the list you created earlier. Let’s call it “SENDGRID_MAILING_ID”.
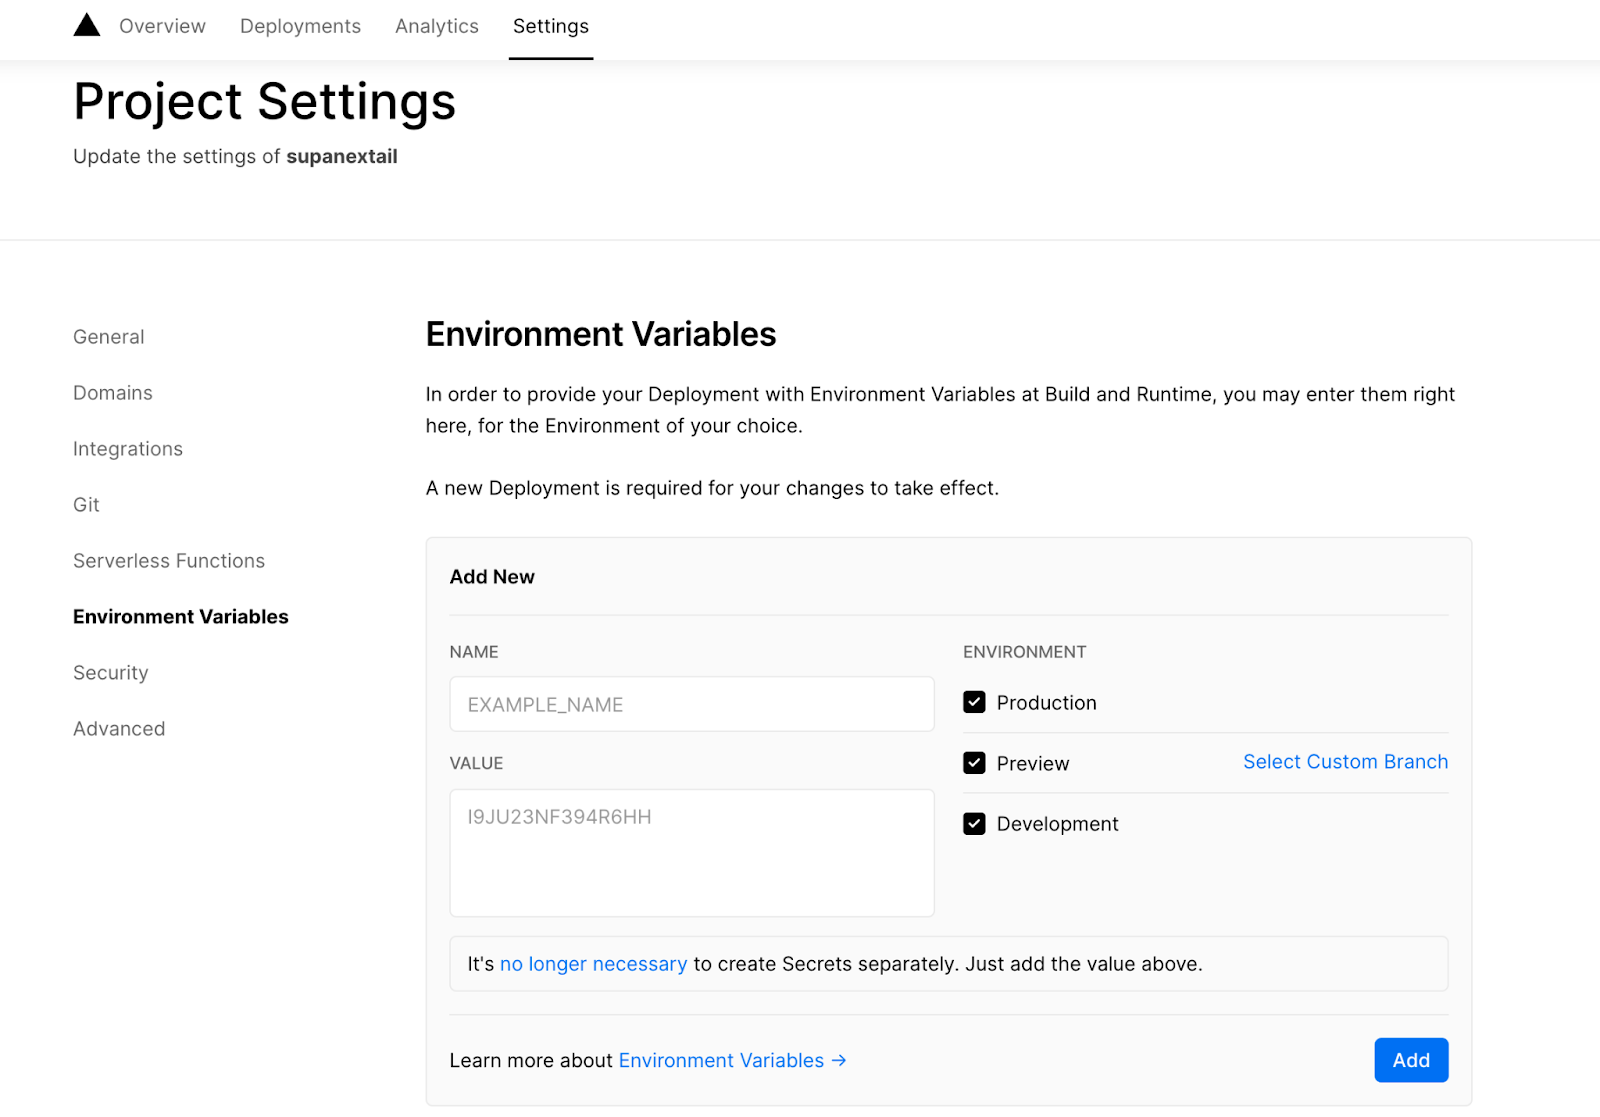
When you publish your site with your favorite provider, don’t forget to include your variables.
Create your backend script
Let’s get started! You are now going to create the script managing the communication with SendGrid to add the user’s email to your newly created list. Don’t forget that with Next.js, you have to put your backend scripts in the pages/api folder.
So I added /pages/api/mailingList.js.
I use axios but you can use fetch if you don’t want to add an extra module. {% gist gist.github.com/Etheonor/77fc1651c71bb9b9f3.. %}
What does this script do?
We are going to use the “PUT” method and send to SendGrid the email address entered by the user (that we’ll retrieve in req.body).
After that, we wait for the server’s response, and send the result accordingly. It’s really not more complex than that!
That’s it for the backend part, let’s take care of the frontend now, you’ll see it’s as easy as pie.
Frontend
We will create a specific component. This one will allow to enter an email address and to click on a button to register in the mailing list. {% gist gist.github.com/Etheonor/11f7d804d0a8304f25.. %} Before I explain how this component works, I use TailwindCSS and DaisyUI, class names you see may not match your usage, you can change them to match your configuration!
Also, I use react-toastify to create a pop-up when the email has been validated. You don’t have to use it and can delete the line containing the toast.success.
For the rest, nothing too complicated. We have an updated input thanks to useState. Moreover, the loading state will be used to block the button when the user has pressed it once.
Once the user clicks on the button, a call is made to the subscribe function, which uses the backend script we created earlier.
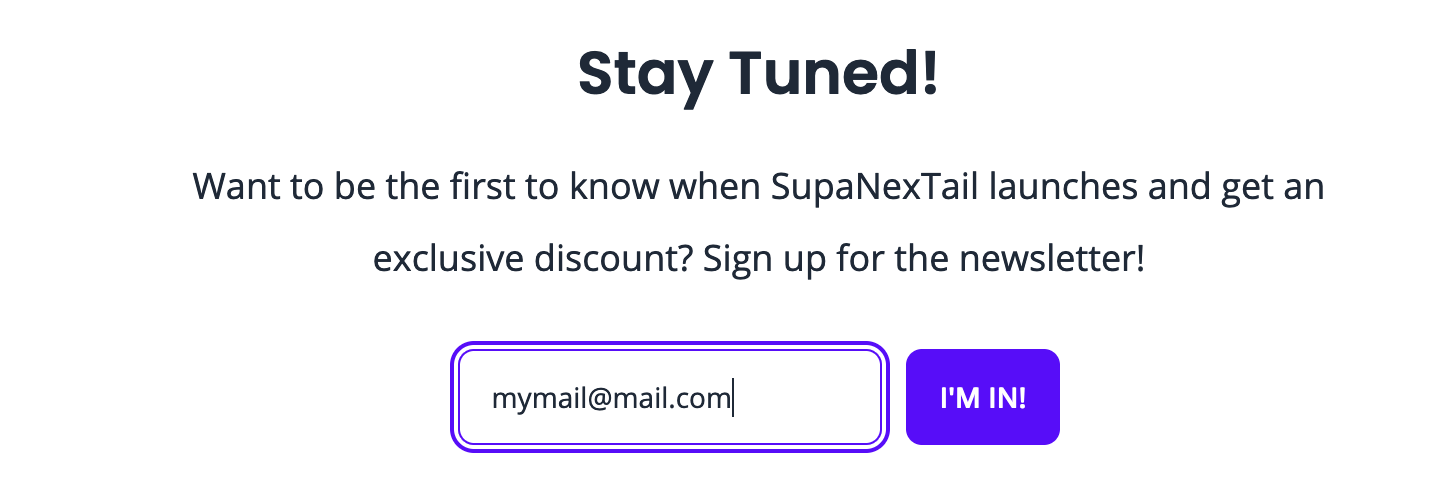
Once the component is implemented on your site, here is the result
And that’s it, you have created a mailing list quite simply. Now you just need to collect the emails of your users!
There are improvements to be made. For example, check that a valid email address has been entered. This is only a first functional version, which you can improve as you wish!
And if you want to follow my adventures, come and say hello on Twitter.